Bridge_Mode.md 3.8 KB
Bridge Mode
A common feature of COTS Wi-Fi routers is to be able to set the router to bridge mode, where the devices stops acting like an IP router (layer 3) and starts acting like an ethernet switch (layer 2). LibreCMC does not actually have a bridge mode, but the same effect is achievable with two easy steps.
- Add the WAN ethernet port to the LAN bridge interface
- Set the DHCP server to ignore the LAN interface
Adjust the LAN bridge interface
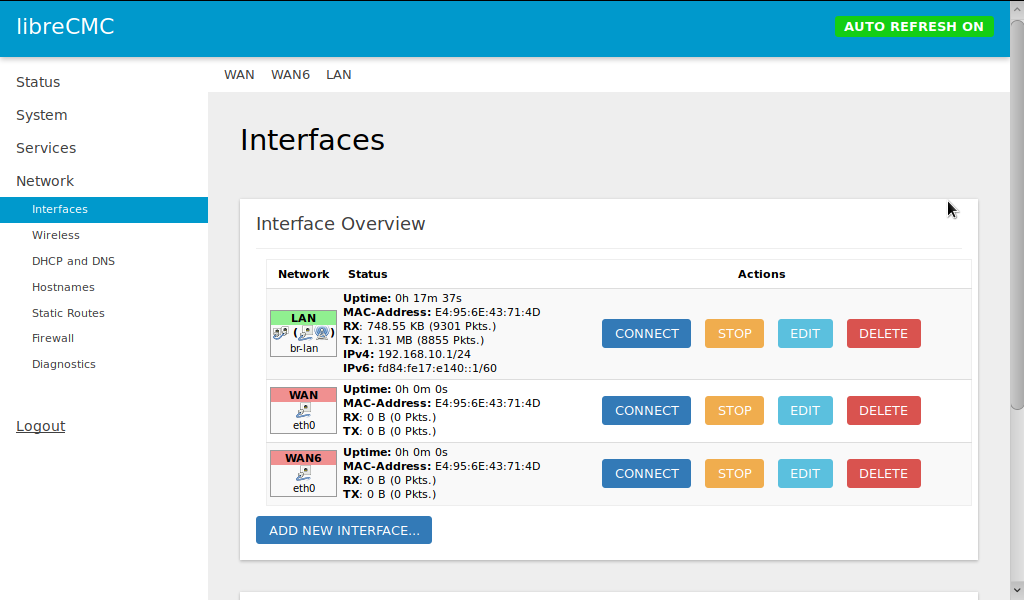
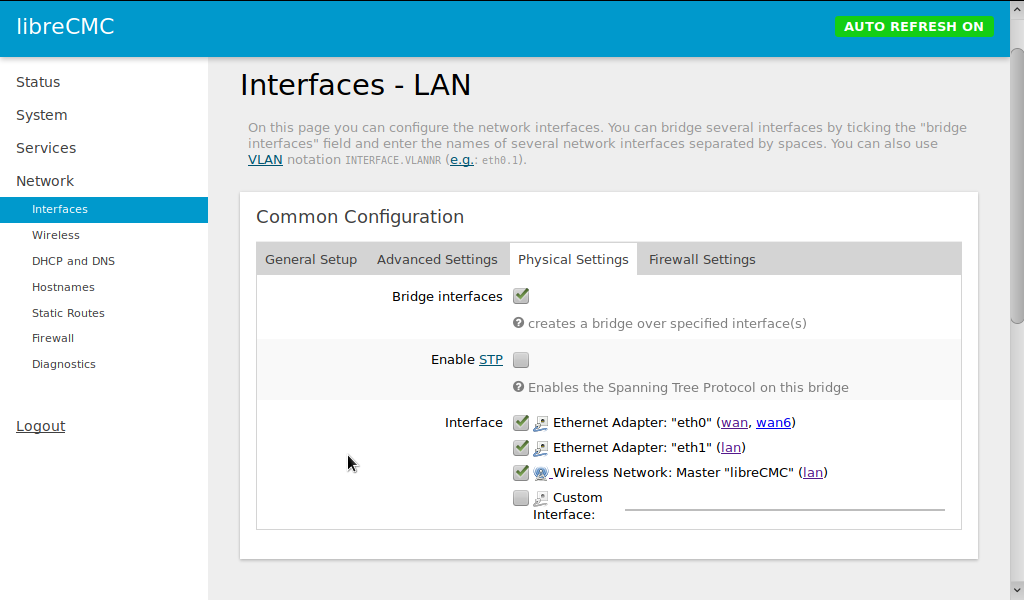
Go to the Network >> Interfaces page and press the EDIT button next to the LAN Network. Select the Physical Settings tab.
Place a checkmark in the box for the "eth0" interface for wan and wan6. (I suppose the interface name might vary amongst different routers.)
You can also check the box for Enable STP if desired. There doesn't seem to be any downside from this, though I suppose it would use a little more CPU cycles and memory. STP is a protocol intended to prevent infinite communication loops from forming in a network of layer 2 switches.
Adjust DHCP server settings
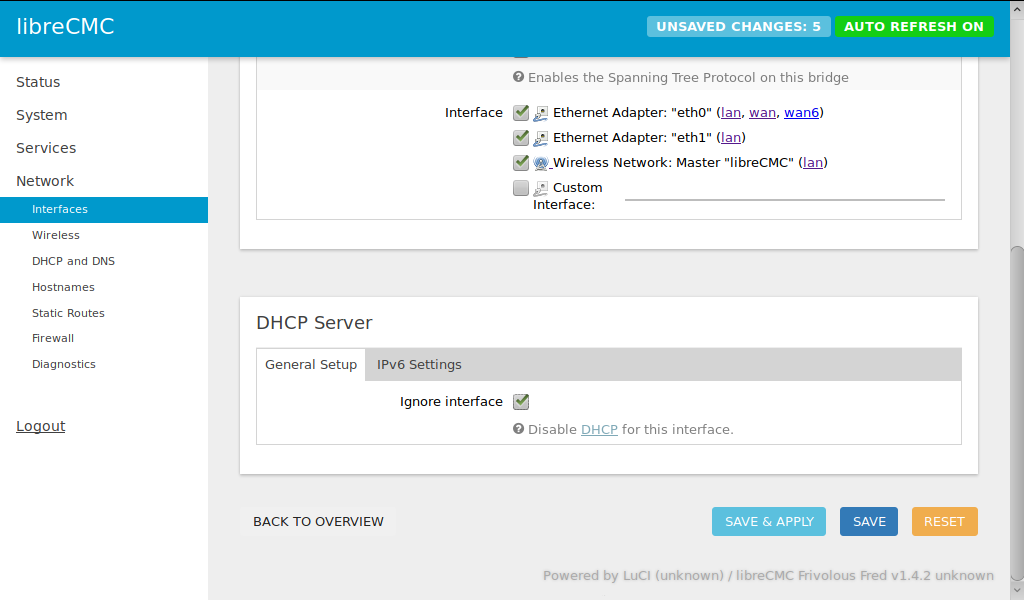
On the same page, scroll down a little to the DHCP Server section. In the General Setup tab, check the "Ignore interface" box.
Save and apply your changes.
Communicating with LibreCMC in "bridge mode"
Now that the DHCP server is turned off, the next time you connect to
the libreCMC device, you will not be able to communicate with it. You
must set your connecting device manually to be on the same
subnet. Since the default libreCMC LAN IP address is 192.168.10.1/24,
it should work to set your connecting device to IP address
192.168.10.2/24.On Gnu/Linux systems, the command is usually ip addr
add 192.168.10.2/24 dev eth0 or dev wlan0 if connecting wirelessly.
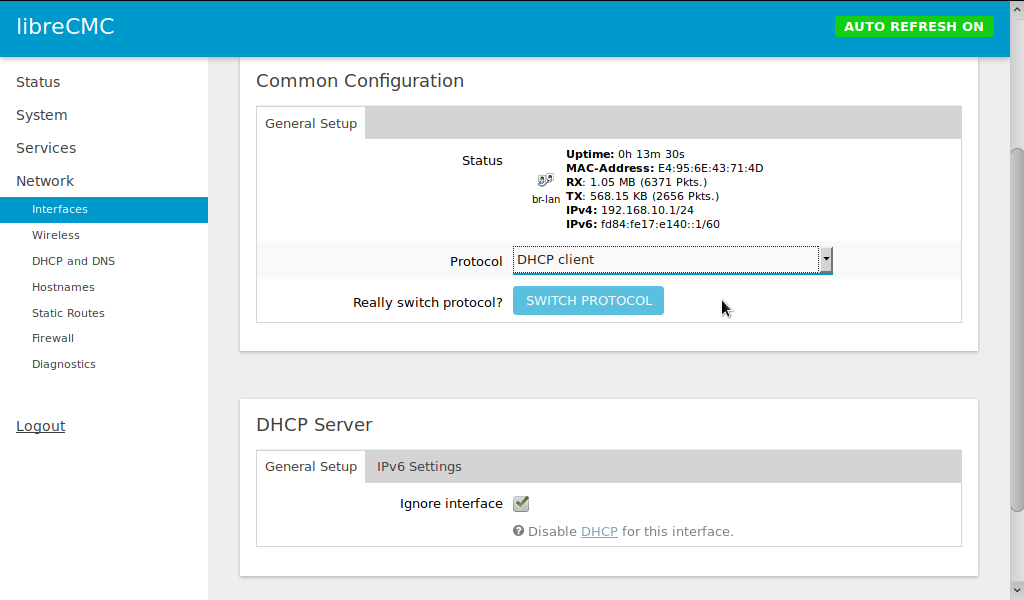
Alternatively, you may set the libreCMC device to receive an IP address from another DHCP server on your network: go to back to the Network >> Interfaces page, press the EDIT button again next to the LAN Network, select the General Setup tab, and switch the Protocol from "Static address" to "DHCP client". (It seems that in LibreCMC, bridging the LAN interface to the WAN port disables the operation of the DHCP client on the WAN interface.) Of course, if you do this, be sure that your DHCP server has reserved a memorable IP address for the LibreCMC device's MAC address, so you don't have trouble finding it.
Advanced
These adjustments are not required, but they lead to a configuration which will be more consistent and have cleaner logs.
Disabling odhcpd (DHCP daemon)
In bridge mode, you aren't going to want to serve DHCP out any interface. So you might as well just shut down the whole DHCP server. Log in via SSH, and run the commands:
/etc/init.d/odhcpd stop
/etc/init.d/odhcpd disable
Delete the WAN(6) interfaces
From Network >> Interfaces, you can delete the WAN and WAN6
interfaces. See also the "Add a LAN6 interface" section below.
Delete the WAN Firewall Zone
From Network >> Firewall you can delete the WAN zone. If you do
need a WAN firewall, then you should not be running in bridge mode in
the first place.
Add a LAN6 Interface
If you have IPv6 access, you will want an interface which receives an
IPv6 address. From Network >> Interfaces create a new interface
called LAN6 with Protocol set to DHCPv6 client.
You will likely also want to disable odhcpd (see above). Otherwise
your logs can get filled up with unnecessary IPv6 related messages, as
libreCMC tries to act like an IPv6 router. odhcpd normally handles
DHCPv6 as well as IPv6 Router Advertisements.


